Showing posts with label nail art. Show all posts
0

This week's nail art

Posted by Buls on 8:09 PM in , , , , ,
My hubby was not home this weekend and I had ample time to myself.

This is what I did. It was time consuming because I planned to do only half the nail and then decided to cover the whole nail with spots.

How to do it:
- Apply base coat. I used Sally Hansen's miracle cure
- Apply base nail paint. I used Colorbar's white shade first but the nail paint has dried. I removed it and then used Inglot's white shade
- Use a toothpick to make dots. I did not have any (keep forgetting to buy them)... used the brush from Inglot's nail art pen.
- I made the dots with different shades of nail paints - all Inglot
- Apply Inglot gel top coat


0

Nail Art

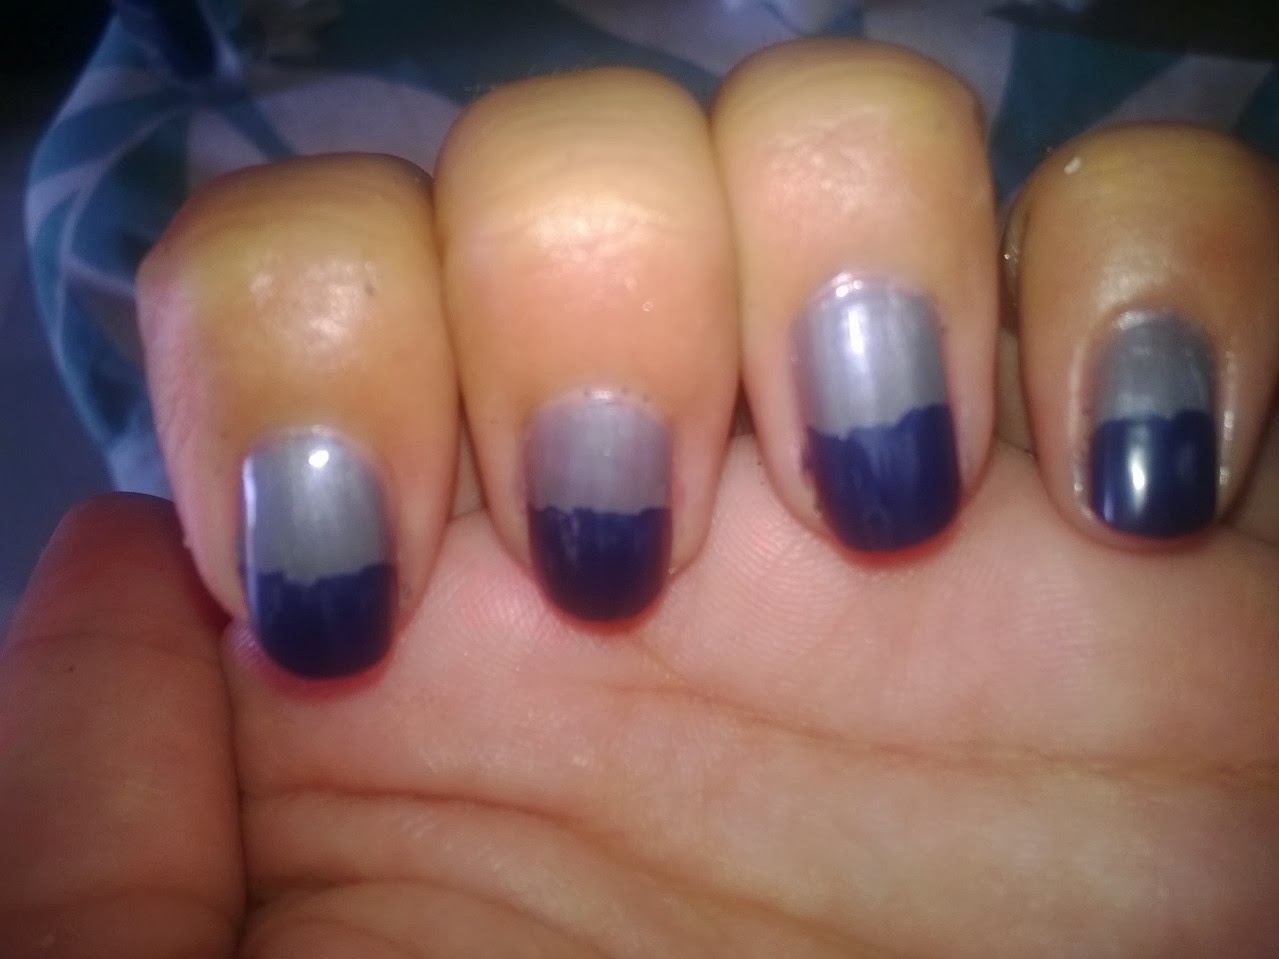
This is what I tried today.


How to do it:


What you need:

- Base coat. I used Sally Hansen miracle cure... got it in the Vellvette Bag
- Grey nail paint. Inglot
- Dark blackish blue nail paint. Deborah Milano
- Glitter nail. L'Oreal grey glitter
- Top coat. Sally Hansen insta dry nail paint

Step 1) Apply base coat
Step 2) Apply grey nail paint


Step 3) Apply blackish blue nail paint on the top half of the nails


Step 4) Apply glitter nail paint on the darker colour


Step 5) Apply top coat

0

Bandhani inspired nail art

Posted by Buls on 9:31 PM in , , , ,
I was bored with my nails and wanted to try a nail art. I decided to try blue on blue with an ear bud (I do not have any toothpicks at home).
The result was a little messy and not uniform but looked like a baandhani design.


How to do it?

1) Apply base coat. I used Sally Hansan's miracle cure I received in my Vellvette box
2) Apply a dark blue colour nail paint. I used Inglot... love the colour.
3) Use Colorbar's light blue nail paint for making the dots. I dipped the ear bud in the nail paint and made the dots
4) Apply top coat. I used Sally Hansen's insta dry top coat

Takes 15 minutes.


0

Nail Art for work

Posted by Buls on 11:21 AM in , , , , , ,
I have joined a new job and am back at Delhi. Yeah... lots of shopping except I don't feel like it.

Anyway, I have been very lazy and pushed myself to try a new nail art. Since it is my first week at work I don't want to try something drastic and wanted something subtle.

This is what I did- glossy tips on matte nails.

Nail paints used- base coat (Sally Hansen nail whitener- do not like it... trying to finish it off), Maybelline Colorama black nail polish, Inglot matte top coat, Inglot nail art pen in black (you can use a regular black paint also but the thick brush will be tricky to use).


 How to:
- Apply base. Apply black nail paint
- Let it dry. Top with a matte coat
- Let it dry.
- Carefully apply black nail paint on tips
- Do not use any top coat else the matte effect will be gone


This is a very subtle nail art and noticeable only at close quarters. 

0

July Vellvette Box

The much awaited box is finally here. My colleague received it on Friday but I didn't. I was so disappointed. And then it arrived on Tuesday. Weird!!! Wouldn't it have saved money if we both would have received it on the same day?

Anyway, I was very excited on seeing her box.


The products in my box:
- Sally Hansen Miracle Cure: Full size product. MRP Rs 675. I am so happy to receive this product. My nails are in bad shape- brittle, chipping, yellow. This product claims to strengthen nails by 50% in 3 days.

- Nyassa Passion Burst Body Mist: sample size. Normally, I would be happy to receive a body mist but this one smells like a very cheap perfume. Hate it.

- LA Splash glitter masacara: Full size. MRP Rs 895. I am happy to receive a full size mascara which is also smudge proof... just what I need during monsoons. Love it. I wish I could have received a funky colour like blue or purple... but I will make do with a glitter mascara... my first.

- Bling nail appliques: Full size. MRP Rs 150. I am happy to receive these since I do experiment with nails. They are very delicate and need to be carefully applied. Unlike the other nail stickers, a top coat also needs to be applied. Love the net and flower design.


0

Ombre nails

Posted by Buls on 5:54 PM in , , , ,

I try some nail art every week but for the past 2 weeks I have not done anything. This weekend I decided to try something complicated, absolutely new and exciting- ombre nails. 'Ombre' means 'shaded'. It means multi coloured with colours graduating from light to dark (or vice versa).
The technique is actually quite simple. Take 2 colors... any 2 colors. I used pink Colorbar and purple Inglot nail paint. Put a few drops of each colour on a plastic... even a polythene will do. Place them next to each other. Take a wet sponge (I used a make up sponge)... dip them in the colour such that both colours come onto it. Dab them on the nails. Ensure that one colour is on top and another on the bottom on each nail. I had to do it 3 times and got the nail paint around my nails. Once it is dry, apply a top coat. I used the Inglot gel top coat. The top coat will make it look even.
Now take a cotton bud, dip it in acetone and clean up around the nails. Tada.... ombre nails are done.

You can go through this link for step by step instructions:

http://www.glamour.com/beauty/blogs/girls-in-the-beauty-department/2012/05/gradient-nails-picture-tutoria.html
The only difference is that I did not paint my nails first. Actually, I did but used the purple nail paint which is much darker and the pink was not visible. You can skip the bottom coat.


0

Nail Art

I have been trying out nail art recently and decided to post the pics:

Used- Inglot white nail paint (hate how streaky it is), Colorbar crackle nail paint. This does not look too good but I wanted a twist on the usual crackle.


Used- Inglot pastel pink, Revlon glitter nail paint. I loved this one. Instead of painting the whole nail with glitter I have only used it on the top half. This reminds me of a fairy.


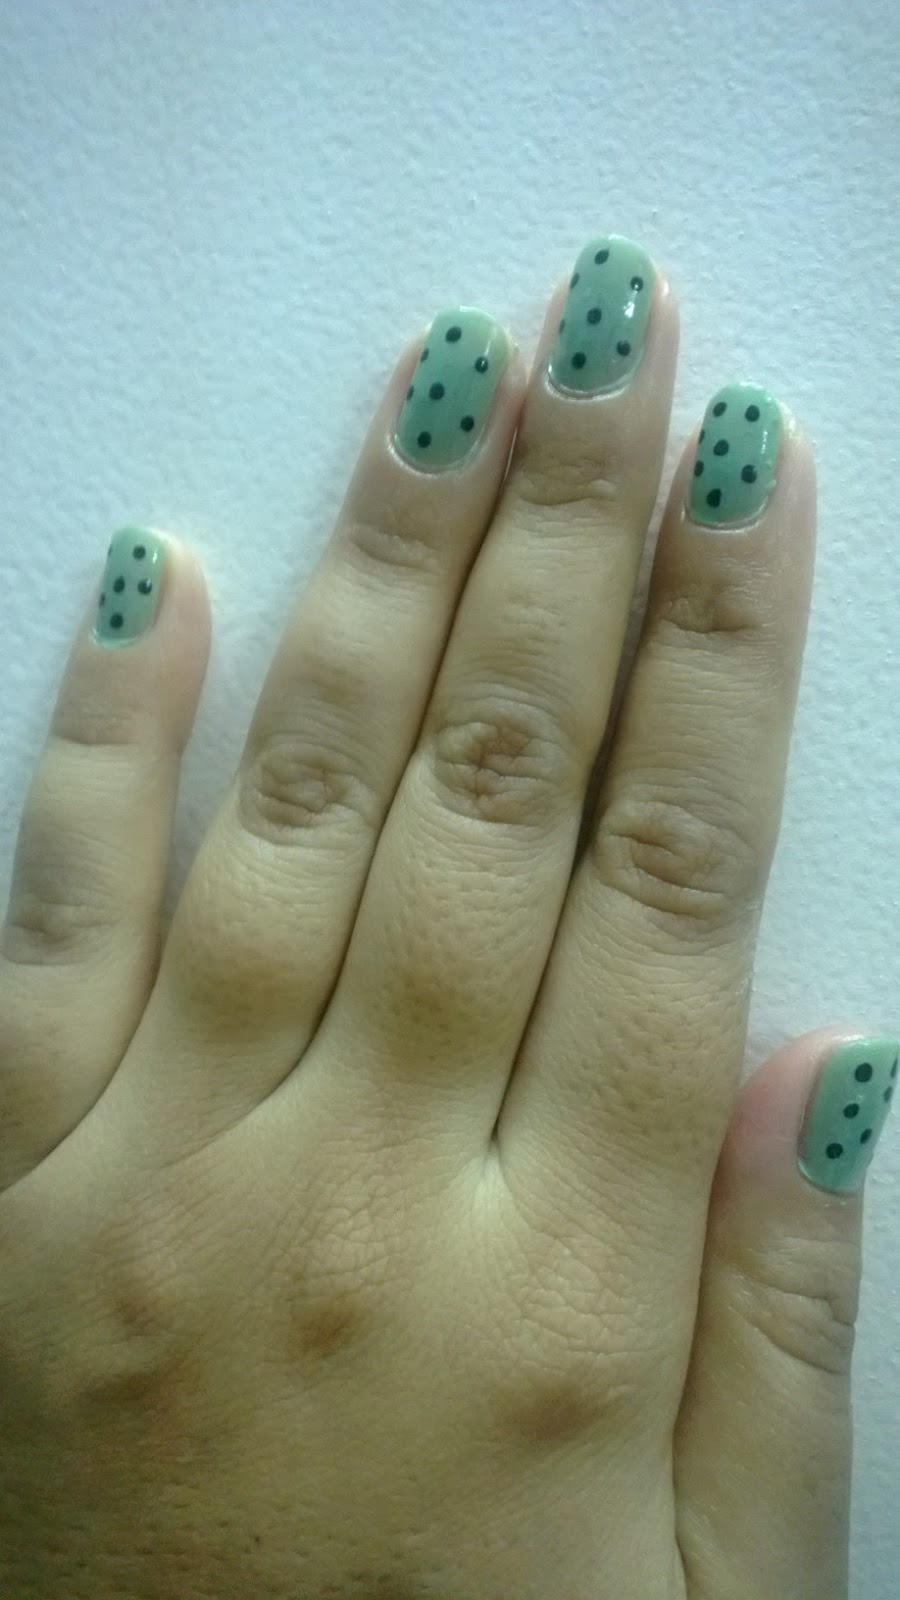
Used- Maybelline Colorama, Inglot nail art black pen. Polka dots are the easiest to create. I love the base- mint Maybelline nail paint... I just painted the dots with Inglot nail art pen.


Used- Maybelline express finish for base, L'Oreal color riche Le Vernis orange paint for dots. I saw orange on orange on one of the blogs and decided to try it out. The base is a shimmery, light orange nail paint. The dots have been painted on with a tooth pick. Compared to a nail art pen, the dots are large. I like them. Using tooth picks is so much cheaper and there is no constraint of nail paint used.


0

Colorbar Turquoise nail paint

Posted by Buls on 10:02 PM in , , , , ,
I applied this color yesterday... after a long, long time and loving it. My routine for nail paint is Sally Hansen's base coat, nail paint, nail art on thumb and Sally Hansen quick dry top coat.

WP_20130310_025


The shade is rightly named turquoise. It is a different blue and I really love it. It applies sheer in 1st coat and the 2nd coat makes it opaque. The nail paint is also quick drying (not mentioned on the bottle). I love colorbar nail paints. They are the best quality.

WP_20130310_026


WP_20130311_002


Price is Rs 150 (if I am not wrong) for 9 ml.

Copyright © 2009 Daily, Quirky Fashion All rights reserved. Theme by Laptop Geek. | Bloggerized by FalconHive.